Few of us enjoy cleaning the bathroom – it’s the first thing I clean each week to get it out of the way! But when you realise your efforts have actually made things worse, that’s even more upsetting.
There’s endless cleaning products, gadgets and hacks available to help clean your bathroom, and while some are great, others can do more damage than good, particularly if they’re used incorrectly. In some cases, you could leave irreparable damage behind. In the worst case, you could even create a potentially life-threatening situation.
As the Household Advice Editor, I hear some horror stories around cleaning the bathroom. Below are some of the biggest mistakes I’ve come across, some of which have happened to myself as well as members of the wider GH team.
1. Bleach-streaked tiles
While I was out, my partner removed mould from the bathroom ceiling with a bleach-based cleaner. At first, I was over the moon to see the black spots had disappeared. But as I looked more closely, I realised the stone tiles on the adjoining walls were covered with pale streaks where the solution had dripped down. This had happened unbeknownst to him during the application and while it was left to work on the mould.
This was not an easy fix, but my trusty electric cleaning brush made it much easier. After rinsing the surface, I let my bathroom cleaner sit on the affected tiles for a few minutes before scrubbing them with the best electric cleaning brush to even out the colouring. It took some time and elbow grease, but gradually it was restored. Thankfully the bleach had just removed surface dirt rather than dyed the tiles!
To avoid this issue in future, I recommend applying the cleaner to a microfibre cloth first and then to the ceiling to better control the application. While you want to be thorough, take care not to apply too much or it will drip down (you could always place an old towel on the floor beneath to protect it). You should always wear the relevant safety gear, including goggles, gloves and a mask when handling products which contain bleach, and make sure the room is well-ventilated.
2. Mixing chemicals
When I mention the dangers of mixing bleach with vinegar at work, people are still surprised. When combined, bleach and vinegar create a lethal chlorine gas, which is potentially life-threatening when inhaled.
While most of us are unlikely to mix them intentionally, accidents can still happen without your realising. For instance, you might leave bleach down the toilet and then attempt to clean the bowl and seat with white vinegar. Or you might attempt to unblock a drain with vinegar, leaving it sitting on top of the blockage and then tip bleach on top.
Mixing any chemical cleaners together is potentially dangerous, so avoid this mistake at all costs. And always wear the relevant safety gear when handling any chemical cleaners.
3. Green grout
Grout is a tricky customer to clean. It gradually becomes discoloured as limescale, soap scum and mould develop in the recess. Before you know it, your once white grout appears orange and black from bacterial growth – not a great look.
I’ve heard many a disaster stories when it comes to cleaning grout. A colleague of mine once attempted to clean it with the green scouring side of a typical kitchen sponge. The result – green grout, which couldn’t be restored and needed covering up with a grouting pen. Speaking of which, another colleague tried to cheat when cleaning her fiddly mosaic tiles by using a grouting pen. She didn’t realise she needed to clean her pre-existing grout beforehand, which ruined the pen and left her with a mess she had to scrub by hand anyway.
There’s no quick fix to cleaning grout, but there are products you can use to make the task easier. I always recommend starting off by applying a standard bicarb paste and then spraying white distilled vinegar on top which creates a chemical reaction to help lift any residue. Then you need to use an old toothbrush, or better yet an old electric toothbrush, or even a cleaning brush, to scrub away what remains.
On its own, vinegar is great for dissolving limescale, while the abrasiveness of the bicarb paste will help with scrubbing any residue away. If you’re dealing with mould, you will need a mould remover spray, such as HG Mould spray. Don’t forget to use a sealing spray to seal the grout and better protect it in the future.
4. Scratched toilet bowl
If you clean your toilet with a metal toilet brush, or try to unblock it with a drain snake, you run the risk of scratching the bowl. The result is a bunch of unsightly black marks beneath the water level, which you seemingly can’t do anything about.
But there is a solution for this. You’re not actually dealing with scratches here; it’s just marked where the metal has rubbed on the surface. You can remove these with the right cleaning tools and method.
According to Brian Toward, CEO at Wholesale Domestic: “First, drain the toilet bowl so you can see the marks clearly and tackle them properly. To do this, turn off the water supply at the isolation valve (usually located on the pipe behind the toilet) by turning it clockwise. Then, flush the toilet to empty the bowl.
“Using a pumice stone can be a really effective way to deal with stubborn toilet marks — especially if they aren’t budging with a cloth or sponge. It works as a natural abrasive, meaning it can lift off metal marks, limescale and mineral build-up with just a bit of water and gentle pressure.
“First wet the pumice stone thoroughly. This softens it slightly and makes it safe to use on ceramic surfaces without scratching. Then, gently rub the marks in small, circular motions, applying little to no pressure — let the texture of the stone do the work for you.
“There’s no need to add any cleaners (in fact, avoid it completely) as pumice is porous and can soak them up, which may transfer to other surfaces when you use it next.
“It’s a great go-to method if you’re looking for a more natural, chemical-free way to get your toilet bowl looking spotless! Just remember to only use it on the ceramic part of the toilet — steer clear of plastic fittings or coloured seats, as the abrasive texture could scratch or damage those more delicate surfaces. Once you’re done, turn the water back on by twisting the isolation valve anti-clockwise, then flush the toilet a couple of times to refill the tank.”
To prevent such marks in the future, avoid metal toilet brushes which are likely to ‘scratch’ in use. A silicone and plastic design like this one from Joseph Joseph could be a more toilet-friendly alternative. And rather than a metal drain snake, you could try using a plunger instead.
5. Drying your towel on the shower door
There’s never enough rails to dry my towels! Between me and my partner, we need to hang two large bath sheets per day, as well as a third towel which is used to wipe out the shower. When I first moved into my flat, I initially dried one towel over the glass shower door to save space, but this was a big mistake.
Before I knew it, speckles of limescale covered the top of the shower screen, giving it an almost misted appearance. This took some real elbow grease to remove with a solution of half white vinegar, half water and a microfibre cloth. An electric cleaning brush would really help here too, with the right attachments.
The towel couldn’t dry properly because the air couldn’t circulate. This left it damper for longer which encouraged mould in the bathroom too. Ultimately, your towels should be dried in a suitable, well-ventilated space, where the air can circulate fully. You should avoid hanging them over radiators because this can damage the towel and stop the radiator from heating your home effectively.
6. Ruining the floor
It’s essential that you keep your bathroom floors clean; all kinds of residue get splashed down here that we’d rather not think about! But using the wrong cleaning tools and solutions can do some real damage.
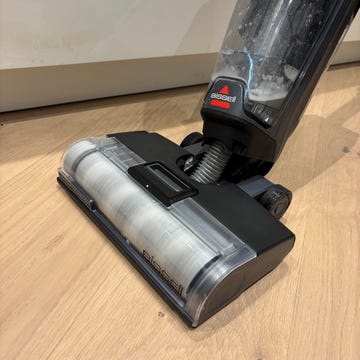
A major mistake here is using a steam cleaner on vinyl flooring. The intense heat of the steam can melt the adhesive and warp the floors, causing them to peel, swell and deform. Instead, once vacuumed, you should simply wipe over with a damp mop and a mild detergent, rinsing after wiping. If you’re dealing with any scuffs, apply neat washing up liquid directly with a microfibre cloth, or try white spirit, before rinsing.
Likewise, you should avoid using too much water on sealed wooden floors, because this too can swell and crack from the moisture. A damp mop is best on this surface. Steam cleaners are sometimes safe to use, but only when the floor is fully sealed with no chance of the moisture penetrating. You should always refer to your manufacturer to check.
7. Damaging surfaces
When it comes to household cleaners, bathroom specific ones are some of the most powerful. That’s because the stains we face in the bathroom are tough. However, if you don’t check your surfaces are suitable for these chemical cleaners before use, it can lead to irreparable damage.
A colleague once used a cream cleaner on her natural stone surfaces, only to find the finish degraded, leaving unsightly scratches behind. Delicate surfaces such as limestone, marble and granite can easily be damaged by chemical and acidic cleaners, including the likes of white vinegar. Stick to cleaners as recommended by the manufacturer, or use a proprietary cleaner suited to the surface, such as HG Natural Stone Bathroom Cleaner.
It's worth adding that gold plated fittings in the bathroom can also be degraded by vinegar. Instead, wipe between uses and use a simple solution of washing up liquid to restore.


