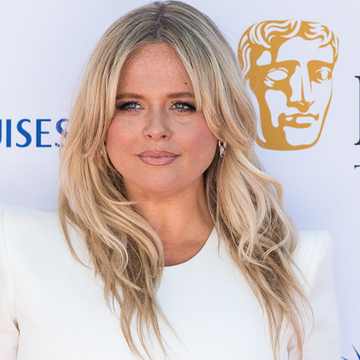
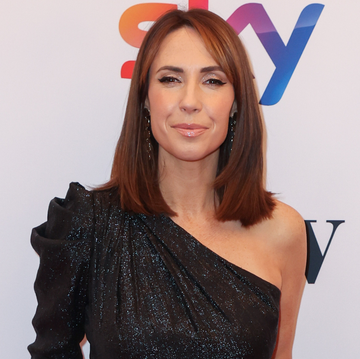
Much like a fresh mani or a bold lip, a blow-dry is a failsafe way to inject a touch of glamour and polish into an otherwise jeans-and-T-shirt kind of day. Whether it’s for lifeless roots in need of some oomph or the perfect way to round off a salon trip, a luxurious bouncy blowout is universally flattering – and a celebrity staple.
But while it’s lovely to leave it to the professionals, a combination of time, finances and availability of salon appointments often forces us to take matters into our own hands (preferably aided by one of the best hot brushes or best hairdryers on the market, as tested by GHI).
Lucky for us, modern tech innovations and hardworking styling formulas mean that recreating a pro blow-dry at home is easier than ever, especially for beginners and those in a time crunch.
Plus, the final tool: an all-encompassing guide to all the tips, tricks and tech you need to blow-dry a range of hair types at home, courtesy of some of our favourite hairstylists and experts in the industry.
What do I need for a blow-dry?
Achieving a great blow-dry requires a solid toolkit of all the essential products to take you from prep to styling, right through to aftercare. Before you begin, make sure you have the following items lined up and ready in your arsenal.
Detangling brush
By opting for a brush that’s specifically designed for use on wet strands, you’ll minimise any breakage and damage to your hair while it’s still damp. We love both Manta’s Original, £30, and Straand’s The Mane Master Wet-To-Dry Detangler Brush, £10, for a gentle option that suits all hair types, from Afro to fine.
Hairbrush
You’ll then need a second brush for during your blow-dry, since detangling and smoothing each section as you go is the key to a seamless blowout and an effective dry. Try Hershesons The Everyday Essentials Brush, £34, for a smooth nylon and vegan boar bristle blend, which also has antibacterial properties, so it’s kind to the scalp. Alternatively, we like ghd’s The Blow Dryer Radial Brush, £26, for its round, ceramic-barrelled design and non-slip handle, which make styling even easier.
Heat protectant
According to LA-based hairstylist Riawna Capri (whose client base includes Goldie Hawn and Natalie Dormer): ‘All hair types should be prepped with a heat protector.’ Since this is to protect the hair from damage caused by heated tools, there’s very little room to skimp out here (read on to find out why). While there are both sprays and cream formulas on the market, Riawna likes to use a volumising version for fine hair (such as Olaplex Volumizing Blow Dry Mist, £28) or one such as Beauty Pie’s Magic Smoothing Heat Shield Spray, £13 for members, with smoothing properties, to minimise frizz.
Leave-in conditioner
A leave-in conditioner or lightweight hydrating cream not only helps to reduce tangles, but is ideal for those with curls and coils. Renée Gadar, Aveda’s global artistic director of texture, recommends applying a leave-in such as Aveda’s Nutriplenish Leave-In Conditioner, £36, to damp hair before blow-drying, as this offers protection before the curl pattern sets in.
Clips
For ease, and to make sure each area of the head can be fully dried, it’s important to section the hair as you go. We love Hersheson’s The Section Clips, £12, or Brushworks’ Sectioning Clips, £6.99, for a budget-friendly option as they’re lightweight but sturdy, and avoid any unwanted creasing.
Hairdryer
A good tool is the foundation of the perfect blow-dry, and luckily there’s a whole host of quality options to choose from, whatever the price point. We recommend a hairdryer with a concentrated nozzle, as this slim nozzle helps to focus the airflow directly where you want it – especially the Dyson Supersonic Nural Hair Dryer, £399.99, for its smooth finish and heat-reduction design that protects the scalp, and the ghd Air Professional Hair Dryer, £139, which was deemed the best hairdryer for beating frizz by the GHI.
For more of our top tested picks, see the best hair dryers and the best hot brushes for every hair type.
Hairspray
As a finishing touch, a good lightweight hairspray will offer hold and secure your style, without weighing your hair down. Color Wow’s Cult Favorite Firm + Flexible Hairspray, £22, earned a stunning 90/100 in the GHI’s testing, with panellists noting that it lasted all day long with no resprays, and left no sticky residue or overpowering smell. For a budget alternative, Percy & Reed’s bestselling Flexible Hold Hairspray, £9, is just as effective for holding shape and volume while maintaining natural movement.
How do I prep my hair for a blow-dry?
Paul Percival, global ambassador for Babyliss and founder of Percy & Reed, stresses the importance of using a heat protectant as your very first step. ‘It acts as a shield against the damaging effects of heat that can cause the hair to become dry, damaged and colour fading – no matter your hair texture.’
‘Heat protectant is like your hair’s SPF,’ adds Samantha Cusick, hairstylist and a ghd ambassador. ‘You wouldn’t go sunbathing without sunscreen, would you? The same principle applies to heat styling.’
For most hair types, prepping your hair also means removing the majority of the water from your hair after washing and before blow-drying. ‘When doing a blow-dry at home, I recommend taking 85% of the water out of the hair before you start using a hot brush,’ says Zoë Irwin, creative director at John Frieda. ‘Otherwise, you get worn out by wrapping the hairbrush around, so at the point where you’re making a difference, your hands are tired and you don’t get a really good result.’
When it comes to curls however, if your curl type is 4C (where the coil is tighter), Renée suggests a different approach. ‘Your hair will respond best to blow-drying when you start from completely wet – so work front to back, because the front is what you see,’ she explains.
How does my hair texture factor in?
Samantha says to think of hair like a fabric – different fabrics require different care, and as do different hair types. ‘Fine hair needs a gentler touch and lower heat to avoid damage and that dreaded limp look,’ she explains.
Paul echoes this: ‘If you have fine, delicate hair, blasting it with high heat will create unnecessary damage and you’ll end up with frazzled, flyaway ends and no volume,’ he says. ‘You need to be gentle, use a lower heat setting and focus on building volume at the roots.’
‘On the other hand, if you have thick, coarse hair, you can handle a bit more heat, but you need to make sure you’re getting it properly dry to avoid frizz,’ adds Paul.
Renée says that, in terms of tools, you could also use a diffuser attachment on your hairdryer if you have textured hair and prefer to enhance your curl pattern rather than blow-drying it straight.
How do I achieve a blow-dry?
After prepping your hair with a combination of heat-protecting and frizz-fighting products and allowing it to dry as much as necessary for your hair type, our experts offer this step-by-step guide to blow-drying your hair at home.
Step 1: Work in circles and sections
According to Renée, it’s easiest to pin each section up as you go, allowing you room to work on the others. Adam Reed, celebrity hairstylist and founder of ARKIVE agrees. After sectioning the top layer of the hair using clips, he likes to dry from root to tip, on a medium heat setting. ‘Continuously follow the brush with the nozzle of the hairdryer and go over the same section until it’s dry and smooth,’ says Adam.
Zoë also recommends starting at the back of the head, at the nape of the neck. ‘Move your hairdryer in circular motions around the head. Lift up sections as you go and you’ll start to remove the water.’
‘One of my top tips is to blow-dry all around the front hairline, away from the face. For fringes (especially if they’re long and side-sweeping), first blow-dry the section under, then take the brush and blow-dry it back away from the face,’ she adds.
Step 2: Apply products to volumise and smooth
Zoë recommends using a mixture of products: ‘I like to use a volumising spray on the roots and a light cream formulation on the mid-lengths and ends. This could be a leave-in conditioner – just something that will really give you some slip in the hair, since what you want is the hairbrush to slide through the hair without causing too much tangle.’
Every four centimeters around the head, spray the volumising product of your choice at the roots and work the cream product through the ends as you go.
Step 3: Use your hairdryer and brush in tandem
‘With your hairdryer, you want to point the nozzle down the hair shaft. Meanwhile, I like to take a large round brush (I use one that has a mixture of soft plastic and actual bristle hairs) and place it under each section, starting to lift the brush up as I dry,’ says Zoë.
‘Even if I just want a really soft volume, I use a big round brush. That way, you’re working the air at the top as you smooth the brush down to the ends.’
Zoë explains one of her top tips for working with a brush and hairdryer together: ‘One of my tricks is to wrap the hair into the ends, then take the hairdryer and put it underneath the section. So I’m first working on the top, then sliding it through to the underneath.’
Step 4: Cool down for a curl
‘When you feel like the section is dry, press the cool shot button, as this will really settle the hair and set it,’ says Zoë.
‘Essentially, you’re working on a kind of lifting, smoothing motion, then you’re very slightly curling the ends. And if you want more curl, you can take the section and put it into a velcro roller.’
Step 5: Finish with a holding spray and an added shine
A blow-dry looks and feels best when it’s soft and shiny, so it’s important to ensure it lasts, without overloading your hair with product. Adam’s top tip? Use a hairbrush to apply your hairspray.
‘Apply the final fixing spray to a brush and sweep it through the hair, then it holds without any stiffness and is evenly distributed,’ he explains. ‘If you want extra hold at the roots, spray some product on your fingers and work it directly into the root – this allows you to apply the hairspray in a targeted way, and create a more natural finish.’
And while this last step is optional, at GH we’re partial to a bit of gloss. So, to get an expensive-looking finish with minimal effort, Riawna suggests opting for an all-over misting of shine spray or simply a touch of shine serum at the ends – see some of our top picks below.
How do I combat frizz?
Samantha explains that hydration and smooth airflow are the keys to protecting your blow-dry from unflattering frizz and static hair. This means that as well as hydrating the hair with both a heat protectant and leave-in conditioner, ‘when you’re blow-drying, point the nozzle downwards – this helps to smooth the cuticle and prevent those pesky flyaways.’
‘Blowing down from root to end, rather than blasting up the shaft of the hair, is important,’ adds Paul. ‘Otherwise, you can cause the cuticle of the hair to separate, which not only creates frizz, but results in a blow-dry that won’t last!’
And although Riawna says it’s generally best to wait until hair is at least 50-80% dry before blow-drying to reduce heat exposure, for those with coarser hair – for example, if you struggle with frizz or have grey hair – the opposite may be better. ‘Don’t rough-dry your hair or let it air-dry too much,’ she warns, as these hair types need the control that comes from the heat sooner rather than later.
How do I make my blow-dry last?
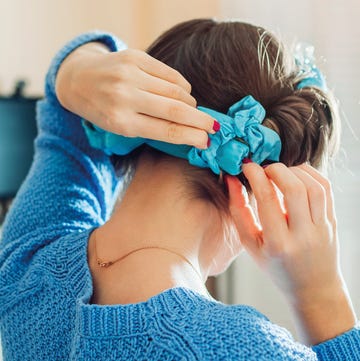
As well as avoiding over-touching your hair (which Samantha warns can lead to greasiness), proper care at bedtime is essential if you want to prolong your blow-dry. Riawna recommends sleeping on a silk pillowcase with all of your hair swept above your head (so you’re not flattening your volume by lying on top of it). Silk is anti-static and causes less friction than cotton, resulting in less breakage.
Renée is also a fan of satin wraps to protect textured hair when sleeping and exercising. ‘Put your hair up in a high bun and tie a cotton bandana around your edges as it’s better at absorbing sweat,’ she suggests. ‘Post-workout, switch to a satin bandana as it’s kinder on your edges, and tie it tightly until your perspiration has dried and then release everything. It’ll help your blow-dry last longer.’
How can I give my blow-dry a quick refresh?
Since there’s only so long you can stretch a blow-dry out, inevitably after a few days, you’ll be in need of a quick refresh. Thanks to Michael Douglas, founder of mdlondon, we’ve learned a handy trick for re-boosting your volume, without needing to start the process from scratch or even get back in the shower. His solution? A ‘dry blow-dry’ of sorts, focusing on the roots.
‘First of all, you need to put some moisture back in the hair,’ he explained on Instagram – whether this means reapplying a styling product depends on how much you used last time. If you opted for a generous amount of conditioner or volumising spray, Michael says that just a few spritzes of water from a spray bottle into your roots will ‘reactivate’ the previous products, offering a fresh canvas to blow-dry.
‘But if you feel your hair is a bit soft and that styling product wasn’t enough, put some in. A blow-dry spray – like ARKIVE The New Form Blow Dry Spray, £14 – is about 90% water, but it has all the styling properties in there as well.’ Michael adds: ‘You’ll then blow-dry just the top damp bit (which will take you about five minutes), as you’ll still have all the natural body and volume from the fluffy, frizzy bits underneath – you don’t have to worry about those as you can’t see them.’
That way, you get the illusion of a whole new blow-dry, with minimal effort and in a fraction of the time. Great hair days, here we come!
Like this article? Sign up to our newsletter to get more articles like this delivered straight to your inbox.
In need of some positivity or not able to make it to the shops? Enjoy Good Housekeeping delivered directly to your door every month! Subscribe to Good Housekeeping magazine now.


